
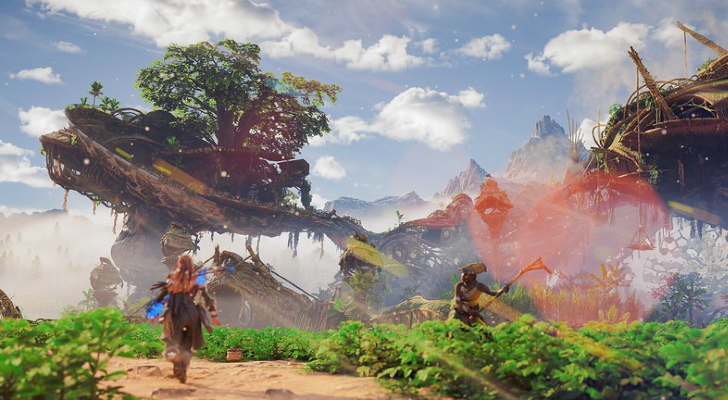
Are you a Horizon Forbidden West fan looking for an adventure? If so, then this guide is exactly what you need! Follow our step-by-step instructions and explore all of the tallnecks in the land - each with unique puzzles, secrets, and rewards. From Cinnabar Sands to Shining Sands, Landfall to The Stand of Sentinels – we’ve got it all covered. So grab your gear and get ready for some serious exploration!
Step 1: Uncovering Cinnabar Sands Tallneck
The first stop on your journey is the Cinnabar Sands Tallneck. To access this location, head south from Meridian until you find yourself at a large stone archway surrounded by sand dunes. Once inside the area, take note of the numerous ruins scattered around – these will come into play soon enough! Now look up and spot a giant robotic creature towering above you – that’s your target: The Cinnabar Sands Tallneck.
To solve this puzzle, start by scanning all four statues around its base (they’re easy to spot). After doing so, four pillars will emerge from underground with symbols carved into them. To progress further in unlocking this tallneck’s data core, match up each statue symbol with its corresponding pillar symbol – when done correctly. Their positions should align perfectly like puzzle pieces. Doing so will activate several platforms near where you entered – use these platforms as steps to reach higher ground and interact with an override switch atop one of them. This action triggers two more pillars nearby which must be scanned next to continue unlocking this tall neck's data core.
When finished, ensure that both sides are entirely synchronized before hitting yet another override switch on top of one pillar (located behind where you initially entered). Doing so finishes unlocking the Cinnabar Sand's Talleck' s data core – congratulations! You now have access to new information about Aloy 's world – well done!
Step 2: How To Override The Locked Shining Sands Tallnecks

Next on your list is figuring out how t o override locked Shining Sands Tallecks. Locate it first – you can find it east from Maker‘s End. When close enough, scan it – this activates several structures around its feet: elevators, bridges, walls etc. All must be used together to synchronize three locks surrounding the Talleck‘s body – and finally open up its data core after being unlocked successfully. Here comes the tricky part: You must do some parkour maneuvers here – jumping onto walls, riding elevators etc. And even though this might seem difficult at first, practice makes perfect – so don't give up! After completing those exercises – you'll eventually reach where you need to press buttons simultaneously at different locations.
Step 3: Exploring Stillsands Talleck
For our third stop, we'll journey westward towards Stillsands Talleck. This robust structure holds valuable information about Aloy's world but requires help from both human hands & machines alike if it ever unlock it fully. Start by locating two gizmos nearby & scan them–this activates a large wall nearby that needs both humans & machines working together if ever want access through it, leading further within Stillsands Talleck itself. This means using Machines as Stepping stones while going across platforms & other obstacles along way–but still, never forget keeping synchronization between both sides throughout entire process or else fail miserably! Upon reaching end point – keep pressing buttons simultaneously until lock opens, ultimately allowing us inside, plus granting us full access over Talleon's Datacore afterwards, too! Congratulations again, explorer! We did It!!
Step 4: Discovering Cauldron Iota Talleck
The fourth place we're visiting today lies northwards towards Carvahall Plains near Red Ridge Pass – Cauldron Iota Tallein awaits us there, filled with many mysteries hidden deep within itself, waiting only for brave adventurers such as ourselves who dare enter inside. First things first – we, gotta locate cauldrons scattered around area just like always – scanning each one leads towards activating panels located all over distant walls creating paths alongside other obstacles meant only for machines – after successful completion, expect finding multiple switches underneath fallen rocks upon reaching destination point – activate all simultaneously opening door leading further ahead revealing even more surprises awaiting us deep below surface. Good luck getting there, adventurer! Make sure having right number companions helping out, too or else risk failing mission entirely!
Step 5: Stand Of The Sentinels'Tall Neck
Onwards we march towards Stand Of The Sentinels, where two puzzles await our intrepid explorer before unlocking entry into something special…and trust me when I say that it really does pay off if successful because what lies inside is genuinely incredible (we won't spoil anything here!). Remember, though, no matter how difficult puzzle-solving may seem, always stay focused – success awaits those who give their best effort here too.
Step 6: Landfall'sTall Neck
Last but not least comes Landfall, which contains one final puzzle needed solving prior accessing whatever secrets may lie within..but don't worry – even though daunting at times, completing these challenges always yields great reward – just make sure you read through everything carefully or else risk missing out on something special.
So there you have it; six steps crammed full of amazing challenges requiring skillful navigation and puzzle-solving expertise – all leading up towards uncovering unique secrets hidden behind each location's respective locks… just remember, though. No matter how excited or overwhelmed by what each entry brings, never forget why we started down such an exciting path in the first place – discovering Horizon Forbidden Wests many wonders along our travels through its lands… good luck out there, my friends… the quest begins now!